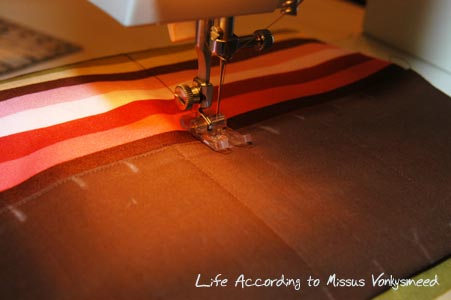
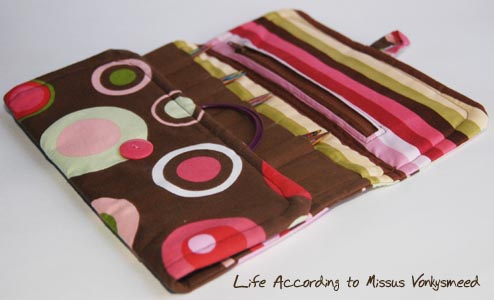
Showing posts with label tutorial. Show all posts

Monday, September 5, 2011

How to: Make a crochet hook case


Not that there aren't some really great patterns/tutorials already available all over the net but yet again I just couldn't find quite what I was looking for.  The free tutorial available at the Moda Bake Shop blog came really close but the instructions seemed overly complicated to me and I just really didn't want to do all that.  So, taking my favorite part of that pattern, the curved flap, I reworked my interchangeable knitting needle case to fit crochet hooks.  A quick disclaimer in the size, this case was designed for long handled crochet hooks as I have a lone Brittany birch wood hook that is 8" long, so I made my case to accommodate it, if you just have the Susan Bates or Boyle hooks you can either cut out the case pieces 1 1/2" shorter and/or make adjustments to the pattern as noted in the portion of the pattern about top stitching for the folds.  So in celebration of September being National Sewing Month, let's get sewing!
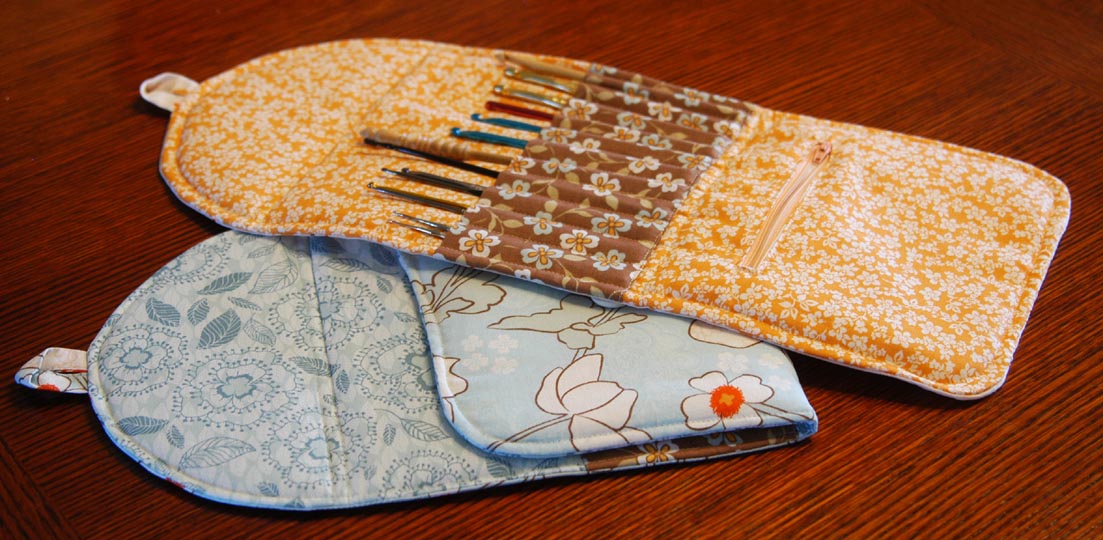
the 2 cases I got out of the fat quarter pack from JoAnn's
 
First gather up your materials:
compass & cardstock template
  • Two 20 1/2" x 9 1/2" pieces of fabric for outside of case and for lining (to make the curved top I used a compass and made a half circle on a piece of cardstock to use as a cutting template for all my pieces)
  • 9 1/2" x 8 1/2" piece of fabric for hooks pocket
  • 2" x 4" piece of fabric for button loop, or make a button hole on the curved top flap
  • Two 5 1/2" x  7 1/2" pieces of fabric for zippered pocket
  • 20 1/2" x 9 1/2" piece of interfacing (whichever weight you prefer, I used heavyweight as that was what I had on hand)
  • 20 1/2" x 9 1/2" piece of batting
  • 7" zipper
  • button


    First you will need to prepare the fabric that will make the pockets your crochet hooks will be slipping into later.  Fold the pocket piece of fabric in half lengthwise, making it 9 1/2" x 4 1/4", then sew with a 1/4" seam allowance along the edge.  After sewing snip off excess fabric, fold the tube right side out and press.

    Next we'll work on the pocket in the lining.  Yet again, I used the wonderful instructions from the U-handbag blog by Lisa to install the zipper and pocket.  If you like to sew you should definitely follow her blog, great stuff there!  Anyway, I put my zipper opening centered at 5 1/2" from the bottom of the lining fabric and didn't use any interfacing for my pocket, other than that I pretty much followed her instructions exactly.  I did need to trim both ends of my zipper before sewing on the second piece of pocket fabric to close it up.

    l: before sewing; r:after zipper sewn in, before pocket lining sewn together

    Then you'll want to make a fabric sandwich by layering together the interfacing, batting and lining fabric.  On top of this sandwich pin the crochet hook pocket fabric 2" above the zipper (this is where the bottom of the hooks will be) and sew along the bottom edge of the pocket fabric.  I like to position the pocket fabric so the top edge of the pocket fabric is the creased fold you pressed earlier, as I think it makes for a cleaner looking opening to the pockets this way.  Then top stitch parallel to this seam 1/4" down from the pocket edge, this will make it easier to fold the case later. 


    placement of hook pocket above zipper

    Next, mark where the seams dividing the crochet hook pockets are going to be located with a cloth marking pen.  I made these marks top and bottom to ensure straight lines would be sewn.  Sew from the bottom to the top of the crochet hook pocket along these marks.  Make sure to leave enough thread on all these seams to pull both ends through to the interfacing side to knot together and cut off the excess.  I started in the middle at 5" in from the left edge and then sewed lines parallel to that one in 3/4" increments to make the hook pockets stopping at 1 1/2" from either edge.

    sewing parallel lines for hook pockets

    measurements for hook pockets

    Next we'll do the top stitching for the upper fold at 8" from the bottom of the hook pocket and again at 1/4" above that (if you need to make the case a little smaller for shorter hooks instead of cutting the fabric out smaller you can just do the top stitching at 6 1/2" from the bottom of the hook pocket and again 1/4" above that).

    placement of top stitching for upper fold

    Now to make the button loop out of the 2"x4" fabric, fold it in half lengthwise (1"x4") and press, then fold the outer edges into the crease and press it flat again.  Fold along the first crease and iron flat once more.  Sew the open edge closed, with approximately 1/8" seam allowance.  Pin the loop to the top center of the lining fabric sandwich, at the end where the curve is, with the raw fabric edges all lined up together and the loop to the inside of the lining.

    l: button loop folded & pressed; r: pinned to top curve

    Layer the outer fabric on top of everything with right sides together, pin around the edges.  Sew it all together 1/4" in from the edge leaving a 4" opening at the bottom to pull the case right side out.  I sewed in a curve around the bottom corners to better match the deep curve on the top flap.  Trim excess fabric all around,  turn right side out, and press all seams. Hand stitch the opening at the bottom of the case closed.  For added stability I sewed a top stitch all around the outside edge of the case 3/8" in from the edge.  Pull all loose threads through to the lining side, tie off and snip excess.

    all pinned and ready to sew shut

    hole that needs hand stitching to close

    If you chose the button loop option fold the case into thirds to position the button so the loop will go around it and hand sew the button on through only the outer fabric.  If you decided to do a buttonhole put it where you like on the upper curved flap and then hand sew on your button to the bottom flap for either option.  Ta-da!  All done.  Now go crochet something!

    finished cases, yea!

    Please let me know if you were able to understand my instructions, or if you have had any problems with them.  I sometimes over think things so may have not made something as clear as I could have.  Happy sewing!

    Friday, January 14, 2011

    How to: Make a tote bag for knitting, crafting or toting

    I can't believe I didn't get better pictures before gifting this...

    I do realize there are probably a million and a half free tote bag tutorials floating around on the web, but I haven't seen anything quite like mine so I thought I'd share.  I absolutely love this bag I created to hold all my various knitting projects and tools and have already made several more as gifts.  If you didn't guess on the timing of this tutorial, yup, the one pictured here was indeed a gift for a certain someone, Granola Mama in this case.  I must say with this pattern there is something I really enjoy about picking out all the various fabrics and seeing how they work together.  { it's located in PDF format here}  Here's what you'll need to make one for yourself:
    • 4 pieces of 18"x 8" fabric for the outside of the tote, one 4 1/2 " x 7 1/2" for the closure, and 2 more pieces 4 1/2" x 28" for the straps
    • 3 pieces of 18" x 7" contrast fabric for outside of bag
    • lining fabric 1/2 yard of 45" wide fabric
    • interfacing (I use either medium or heavy weight), 4 of 18" x 8", 2 of 18" x 7"
    • batting, 4 of 18" x 8", 2 of 18" x 7"
    • fusible interfacing, enough for the straps and closure fabric
    • zipper (if you wish to put in a zippered pocket, you'll need some extra pieces of fabric also)
    • button or velcro
    It is actually a pretty straight forward design (since I came up with it I'd be really surprised if it were anything but dead simple!) and doesn't require any fancy stitch work, well at least not anything I'd consider fancy.

    materials all assembled and ready to sew!

    Thursday, July 15, 2010

    How to: Crochet fortune cookie pattern


    I couldn't find a pattern for an amigurumi or crocheted fortune cookie when I was crocheting tons of play food for Lil' Miss last summer and since she demanded I make a Chinese cookie, I came up with this pretty simple and easy design to create one.  Now to figure out how to crochet a Chinese takeout box to put them in, wouldn't that be cute!  (p.s. don't tell Lil' Miss about that or the demands will begin anew!) {a PDF of this pattern is located here}


    Here's what you'll need:
    • yellow or tan worsted weight yarn for the cookie
    • white worsted weight yarn for the fortune
    • size H crochet hook
    • small amount of stuffing
    • stitch marker 
    • tapestry needle
    For the fortune:

    Chain 7 with your white yarn, make 1 sc in second chain from hook, then make a sc in each chain to end (6sc) finish off.  Set aside to insert into cookie after stuffing.

    For the cookie:

    Start with making an adjustable loop with your yellow or tan yarn, if you don't know how check out this great tutorial here.  Use a stitch marker to keep track of your rounds if you prefer, I certainly find it easier that way!

    Rnd 1: 6 sc in magic loop and sl st to join (6 sc)
    Rnd 2: ch 1, *2 sc in each sc to end*, repeat to end, slst to join (12 sc)
    Rnd 3: ch 1, *1 sc in first sc, 2 sc in next sc*, repeat to end, sl st to join (18 sc)
    Rnd 4: ch 1, *1 sc in each of first 2 sc, 2 sc in next sc*,  rpt to end, sl st to join (24 sc)
    Rnd 5: ch 1, *1 sc in each of first 3 sc, 2 sc in next sc*,  rpt to end, sl st to join (30 sc)
    Rnd 6: ch 1, *1 sc in each of first 4 sc, 2 sc in next sc*,  rpt to end, sl st to join (36 sc)
    Rnd 7: ch 1, *1 sc in each of first 5 sc, 2 sc in next sc*,  rpt to end, sl st to join (42 sc)
    Rnd 8: ch 1, *1 sc in each of first 6 sc, 2 sc in next sc*,  rpt to end, sl st to join (48 sc)
    Rnd 9: ch 1, *1 sc in each of first 7 sc, 2 sc in next sc*,  rpt to end, sl st to join (54 sc)

    End off, leaving a long enough tail of yarn to sew your cookie in half.  Fold circle in half and sew about 2/3 of the way along the open edge.  Gently stuff with a small amount of batting, the points of your cookie will need to meet, so don't over stuff.  Place fortune so it is coming out of the cookie before continuing to sew seam shut all the way around.  Fold cookie in half by gently pressing the center in and pulling tips together until you have achieved the fortune cookie shape, sew the tips together with your yarn tail and then weave the end in.  Give to happy child and watch them play!


      Monday, May 31, 2010

      How to: Make an interchangeable knitting needle case


      At long last, here is the interchangeable knitting needle case tutorial I promised to put together in a previous post.  As my collection of interchangeables grew I needed a place to store them safely (the needle roll I had already made just didn't work for them) and I as am too cheap thrifty to purchase a ready made case, I decided to design and sew one just for them.  And now you can too with this handy dandy step by step tutorial!*  {a PDF of this tutorial is located here}


      First gather your materials:
      • Two 11 3/4" x 17" pieces of fabric for outside of case and for lining (I used basic cotton for all my fabrics)
      • 11 3/4" x 10 1/2" piece of fabric for cable pocket
      • 11 3/4" x 9 1/2" piece of fabric for needles pocket
      • 11 3/4" x 8" piece of fabric for pocket on bottom flap
      • 2" x 4" piece of fabric for button loop
      • 6" x 8" piece of fabric for zippered pocket lining
      • 11 3/4" 17" piece of interfacing (whichever weight you prefer, I used doubled up lightweight as that was what I had on hand)
      • 11 3/4" x 17" piece of batting
      • 7" zipper
      • button

          all ready to start assembly

          First you will need to prepare the fabric that will make the pockets your needles and cables will be slipping into later.  Fold the pocket pieces of fabric in half lengthwise, making them 11 3/4" x 5 1/4" & 11 3/4" x 4 3/4" respectively, then sew with a 3/4" seam allowance along the edge of each (I can't cut a straight line to save my life, so my seam allowance tends to be shall we say, generous!).  After sewing snip off excess fabric, fold both tubes right side out and press the seams and and folded edges.

          Then you'll want to make a fabric sandwich by layering together the interfacing, batting and lining fabric.  On top of this sandwich pin the needle pocket fabric 5 3/4"" from the top edge of the lining (this is where the openings to slip in the needles will be) and sew along the bottom edge of the pocket fabric.  I like to position the pocket fabric so the top edge of the pocket fabric is the creased fold you pressed earlier, as I think it makes for a cleaner looking opening to the pockets this way.

          layers of the fabric sandwich
          placement of the needle pocket fabric
          sewing along bottom on needle pocket fabric

          Next, mark where the seams dividing the needle pockets are going to be located with a cloth marking pen.  Start by dividing the width into thirds, which is approximately 4" in from each side and then make marks 7/8" apart in between these first marks and out to 1 1/2" away from the edges of the fabric (no need to sew lines in the seam allowance area!).  I made these marks top and bottom to ensure straight lines would be sewn.  Sew from the bottom to the top of the needle pocket along these marks except for those first 2 marks you made at 4" in from each side;  these will be sewn later when the cable pocket fabric gets layered on top.  Make sure to leave enough thread on all these seams to pull both ends through to the interfacing side to knot together and cut off the excess.

          marking for seams to divide needle pockets
          sewing from bottom to top to keep fabric smooth

          After sewing the needle pockets, pin the cable pocket fabric 1 1/2" below the top of the needle pocket fabric, (where the openings for the needles to go are) and sew along the bottom of the cable pocket fabric.  Remember those first two marks you made on the needle pocket fabric that you didn't sew?  Well, now you get to sew them, from the bottom of the cable pocket fabric to the top of the needle pocket fabric, if needed transfer the marks down to the bottom of the cable pocket fabric to ensure straight lines.  Turn the whole thing over and make sure each of the threads gets pulled through, knotted and trimmed.

          placement of cable pocket fabric atop needle pocket fabric
          transferring marks to the bottom of the cable pocket fabric
          sewing the pockets for cables from the bottom to the top

          For the zipper and zippered pocket insertion I partially followed a tutorial by Lisa of U-Handbag (I am fairly new at sewing zippers after all!) which I found to be fantastic and a much easier method than my previous attempts at putting zippered pockets into linings.  If you have a preferred method of your own, by all means do that instead if you wish!  I followed Lisa's great instructions with a few exceptions, including (but not limited to!) not using interfacing for the zippered pocket as all it will hold are small, lightweight items.  Make the sewn box for the zipper per Lisa's tutorial with the center line that you will cut positioned 1 3/4"" from the top of the needle pocket fabric.  Make the opening for the zipper 6 1/2" long.  After the pocket lining has been turned right side out, pressed, and the zipper has been sewn on simply fold the pocket fabric up in half to sew closed instead of layering another piece of fabric on top to make the pocket per Lisa's tutorial.  Remember when making the zippered pocket to fold the interfacing and batting out of the way so all you are sewing is the lining fabric, zipper pocket fabric and the zipper.

          zipper hole, see the untouched batting & interfacing
          after judicious pressing & pinning of the zipper
          fold the pocket lining fabric in the direction of the arrow

          Now to make the button loop out of the 2"x4" fabric, fold it in half lengthwise (1"x4") and press, then fold the outer edges into the crease and press it flat again.  Fold along the first crease and iron flat once more.  Sew the open edge closed, with approximately 1/8" seam allowance.  Pin the to the top center of the lining fabric sandwich, at the end where the zipper is, with the raw fabric edges all lined up together and the loop to the inside of the lining.

          button loop, pressed in half and then pressed again
          button loop pinned in preparation for sewing

          Next fold the bottom flap pocket fabric in half and press, then pin it to the bottom of the lining fabric sandwich at the opposite end of where you just placed the zipper pocket and button loop.*  Layer the outer fabric on top of everything with right sides together, pin around the edges.  Sew it all together 3/4" in from the edge leaving a 4" opening to pull the case right side out.  I sewed in a curve around the corners as I think it looks nicer than right angles, but do the corners however you prefer.  Trim excess fabric all around,  turn right side out, and press all seams. Hand stitch the opening at the bottom of the case closed.

          placement of bottom fold pocket fabric
          stitched and ready to turn right side out
          turned right side out and pressed

          For added stability I sewed a top stitch all around the outside edge of the case 3/8" in from the edge.  Next you will top stitch at the two places where the case will fold to close, for the first fold stitch from side to side inside of the outer top stitching at 1" above the top of the needle pocket fabric, and at 1/4" above that seam.  The second fold is located at the bottom of the cable pocket fabric, sew along the bottom edge of the cable pocket fabric and 1/4" above that seam.  Pull all loose threads through to the lining side, tie off and snip excess.

          placement of stitching for top fold

          Fold the case into thirds to position the button so the loop will go around it to keep the case closed and hand sew the button on through only the outer fabric.  Then load up all your interchangeable needle goodness and pat yourself on the back for saving a bunch of money by making it for yourself!

          finished measurements open 6 5/8" x 15 3/8", closed 6 5/8" x 9 7/8"

          Please let me know if you have used this tutorial with success, or if you have had any problems with it.  I am still very new at writing how-to's and tutorials so may have not made something as clear as I could have.  And please enjoy sewing yourself a useful item, I know I sure did!

          *measurements are for needle tips up to 4 1/2" in length, for longer needles the needle pocket can be made up to 1 1/2" longer finished size with no changes to other directions

          *this pocket can also be made to hold additional needles by cutting the pocket fabric to the same dimensions as the needle pocket, sewing pocket dividing lines as per the needle pocket instructions, and adding 1" to the length of the outer and lining fabrics, interfacing and batting.

            Monday, May 24, 2010

            Crafting with kids: how to make a paper lei


            Welcome to my first tutorial, this time about how to make a paper lei!  I thought it was about time for me to actually explain how I created something for your enjoyment and your own crafting fun.  {a PDF of this tutorial can be found here}  Today I am sharing a project I stumbled upon last October when Lil' Miss decided she wanted to be Lilo (yes, Destructo-boy was Stitch!) for Halloween.  I had already made a dress for her by piecing together two patterns I purchased from the local craft superstore, but she needed more than that for a Lilo costume.  She desperately needed that most well known symbol of Hawaii, a lei!  I knew that I would be able to buy her an inexpensive lei rather easily but as I have said before, I really prefer to create from what I already have if at all possible.

            After a quick perusal of my supplies I realized I already had everything I would need to have Lil' Miss help me make a lei for her to wear.  My list of supplies included:
            • A die cut machine with flower dies, card, or cartridge (I have the Slice machine by Making Memories and used Basics card #2), but a single, or an assortment, of floral punches will suffice, or even hand cut the flowers if you are especially crafty!
            • Assorted colors of construction paper or card stock
            • Yarn, long enough to form the necklace and tie it closed
            • Large/medium plastic beads, just make sure the hole is large enough to string the yarn through
            • Large tapestry needle
            We started with Lil' Miss picking out a variety of flowers she wanted me to cut out for her which I did in 3 different sizes, 1.5", 2" and 2.5", and in several different colors of construction paper.  A lei would look just as nice if it were made with all one flower of one size, and/or even all the same color.  I made about 70 flowers if I remember correctly.  Once the flowers were all cut out I had her help me put a hole in the center of each flower with a hole punch (I used the smaller punch on a Crop-A-Dile which is a great tool btw!) , this way the flowers can be strung onto the yarn.

            Once a sufficient amount of paper flowers have been cut out and punched in the middle, prepare your yarn by cutting a length long enough to drape around the child's neck with enough extra to tie it closed.  Then thread the yarn onto your tapestry needle and prepare to hand it over to an eager child with some simple instructions.  The key here is to alternate the paper flowers with the beads while stringing, as doing so will make them stand out more like a lei made with real flowers.

            At this point I let Lil' Miss take over completely, giving her total creative control over the color and floral arrangement (yes, it was very hard to watch her put the same colors next to each other and not have any pattern at all to how she put the beads and flowers on).  I particularly liked the beads we used as they are about 1/4" long so created some nice breathing space between the flowers;  Some basic pony beads would work just as well but would require more paper flowers than I used for the completed lei.


            Once you, or the eager child, have strung on enough beads and paper flowers to make a lei the length you'd like just knot the ends together and voila, a fun afternoon spent crafting together and what, I ask, is better than that! 


            Just a little FYI, as I was instructed at my Aunt's wedding many years ago, the proper way to wear a lei is not like a necklace hanging down from the back of your neck, it should be worn draped on the shoulders with half the flowers across your chest and half draped across your back.  It feels much better this way and the lovely fragrance of the flowers (well, not the paper ones, but real ones!) are closer to your nose too!
            Related Posts with Thumbnails